Ground-Lidar calibration#
Overview#
The ground plane calibrator of TIER IV's CalibrationTools operates under the assumption that the area surrounding the vehicle can be represented as a flat surface. So, you must find as wide and flat a surface as possible for ROS 2 bag recording. The method then modifies the calibration transformation in a way that aligns the points corresponding to the ground within the point cloud with the XY plane of the base_link. This means that only the z, roll, and pitch values of the tf undergo calibration, while the remaining x, y, and yaw values must be calibrated using other methods, such as manual adjustment or mapping-based lidar-lidar calibration.
You need to apply this calibration method to each lidar separately, so our bag should contain all lidars to be calibrated.
We need a sample bag file for the ground-lidar calibration process which includes raw lidar topics.
ROS 2 Bag example of our ground-based calibration process for tutorial_vehicle
Files:             rosbag2_2023_09_05-11_23_50_0.db3
Bag size:          3.8 GiB
Storage id:        sqlite3
Duration:          112.702s
Start:             Sep  5 2023 11:23:51.105 (1693902231.105)
End:               Sep  5 2023 11:25:43.808 (1693902343.808)
Messages:          2256
Topic information: Topic: /sensing/lidar/front/pointcloud_raw | Type: sensor_msgs/msg/PointCloud2 | Count: 1128 | Serialization Format: cdr
                   Topic: /sensing/lidar/top/pointcloud_raw | Type: sensor_msgs/msg/PointCloud2 | Count: 1128 | Serialization Format: cdr
Ground-lidar calibration#
Launching the calibrator#
Source your Autoware workspace and start the sensor calibration manager:
ros2 run sensor_calibration_manager sensor_calibration_manager
Select default_project as the project and ground_plane_calibrator as the calibrator, and click Continue. Then set the launch arguments for the lidar that you calibrate:
| Argument | Description | Value for tutorial_vehicle |
|---|---|---|
base_frame | The base frame of the vehicle | base_link |
lidar_frame | The frame of the lidar to calibrate | rs_helios_top |
pointcloud_topic | The point cloud topic of this lidar | /sensing/lidar/top/pointcloud_raw |
use_crop_box_filter | Crops the point cloud, so walls and other planes do not disturb the estimation | true |
crop_box_min_x and other | The limits of the crop box, in meters | The default values (-50.0 to 50.0) |
overwrite_xy_yaw | Keeps the x, y, and yaw values of the initial calibration | false |
Click Launch. RViz starts with the calibrator. You can save your RViz configuration for later use.
The calibrator needs the tf of your vehicle and sensors. The bag does not give it, because the command below remaps the tf topics of the bag. In another terminal, publish the tf with tier4_vehicle_launch, as on the manual calibration page:
ros2 launch tier4_vehicle_launch vehicle.launch.xml vehicle_model:=<OWN-VEHICLE-MODEL> sensor_model:=<OWN-SENSOR-KIT> launch_vehicle_interface:=false use_sim_time:=true
Then play ROS 2 bag file:
ros2 bag play <rosbag_path> --clock -l -r 0.2 \
--remap /tf:=/null/tf /tf_static:=/null/tf_static # if tf is recorded
When the tf frames and the calibration service are available, click the Calibrate button of the sensor calibration manager. The calibrator estimates the ground plane in the point cloud and calculates the transformation from base_frame to lidar_frame.
| Before Ground Plane - Lidar Calibration | After Ground Plane - Lidar Calibration |
|---|---|
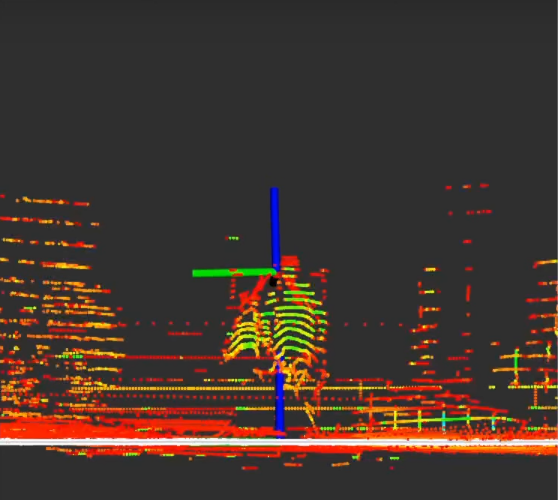 | 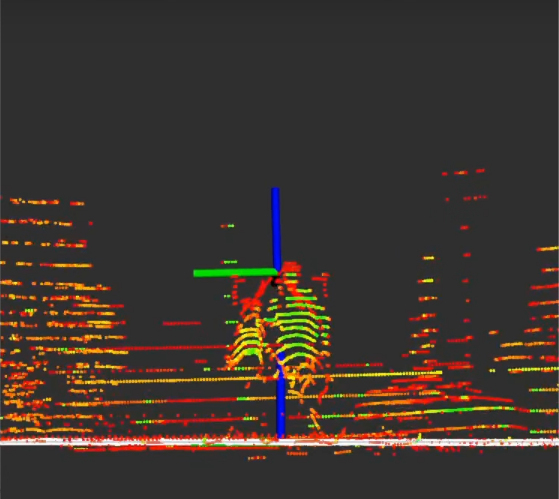 |
The sensor calibration manager shows the result in the Calibration tree and Final TF tree widgets. Click Save calibration to save the result to a file. The result is the transformation from base_link to the lidar. If the lidar is a part of your sensor kit, convert the result to the frame of sensor_kit_base_link before you write it to sensor_kit_calibration.yaml. Do the calibration again for each lidar.
Here is the video for demonstrating the ground plane - lidar calibration process on tutorial_vehicle. The video shows an earlier version of CalibrationTools, so the windows look different.